My Favorite Needle Felting Resources

Here it is, you hit the jackpot! This is a comprehensive list of my favorite needle felting supply resources that has been in the making since I started felting in 2009. I will update this list regularly so check back in the future in case I’ve come across any new stores, websites, or fiber festivals.

And of course if you know of some awesome needle felting resources and want to share, please do so in the comments below!

_MG_3446.jpg

Online suppliers:

I have been shopping at these first two websites since 2009 and get about 50% of my total yearly supplies from those two companies. They have consistent colors (and a huge assortment). They also carry needles, foam pads, and wool fabric. Kits are available as well. If you shop at the Felted Ewe, tell Tina that Once Again Sam sent you!

https://www.thefeltedewe.com/
https://www.weircrafts.com/
https://dorrmillstore.com/

https://bearcreekfelting.com/


Local Craft Stores:

Your local craft store may carry some needle felting supplies, but I find they're somewhat limited. They will most likely carry small 0.5 oz. bags of roving, which is fine for smaller projects. It’s a little more expensive to purchase this way, but if you’re just starting out and want to try out a few colors before you load up your craft room with pounds and pounds of roving, this is a perfectly fine way to go.

Craft stores often have combo packs of different roving colors and usually an assorted pack of needles as well. If you like to work from kits, they’re bound to have some of those too!

Micheals

Hobby Lobby

Joann Fabrics

Regional Supply Stores:

Both of these stores have roving by the ounce, which is fantastic. You just pull off the amount of the color you want, they weigh it, and you pay for that amount. I wish I could buy all of my roving this way.

Asheville, North Carolina: Earth Guild

Newport, New Hampshire: Dorr Mill

Fiber Festivals:

If you happen to be in a state that has a wool festival, go check it out in person! It's well worth the drive. You can buy everything you'd ever dream of having for your needle felting journey, including a pet sheep if you’re so inclined (and I am, believe me…it’s just convincing my husband that we can have a sheep here in the suburbs).

Most of these festivals also have classes and demos available. I can’t say enough about them - they’re incredible! This is a quick video tour from my last time visiting the Southeastern Animal Fiber Fair (SAFF).

These are a few fiber fairs I have personally attended and highly recommend. 

North Carolina: SAFF (Southeastern Animal Fiber Fair): https://saffsite.org/

North Carolina: Carolina Fiber Fest http://www.carolinafiberfest.org/

Maryland: The Maryland Sheep & Wool Festival ​​​​​​​https://sheepandwool.org/

OnceAgainSam6347.jpg

Here’s a peek at some needle felting terminology, just so you know what you’re looking for (or googling). I wish I had know these terms when I first started out needle felting in 2009. I would have saved myself a lot of trouble!

Terminology:

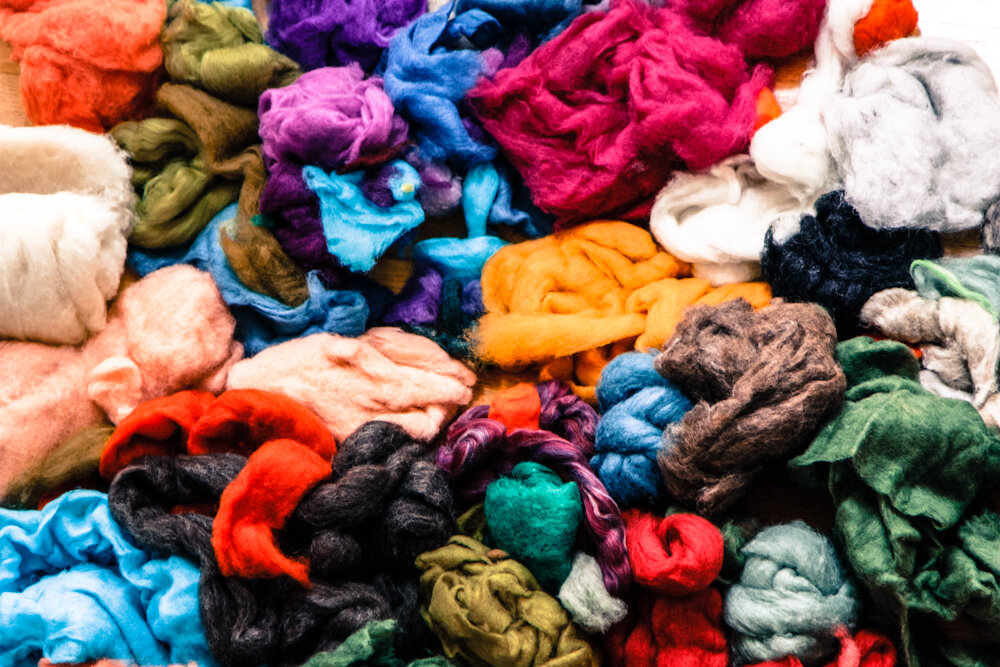
Roving: wool fiber which has been cleaned, combed, and dyed. It’s used for the top layer in needle felting. Roving usually comes in a long “rope” that’s rolled into a ball. 


Batt or Core fiber: wool fiber that has been cleaned and can be dyed (though it can also be natural since it’s going to be covered up with roving). It’s used for building up a 3D shape and is typically fluffier than roving, so it’s great for adding bulk.  


Raw Fleece or “Locks”: unprocessed fiber that has maximum texture and curl. 
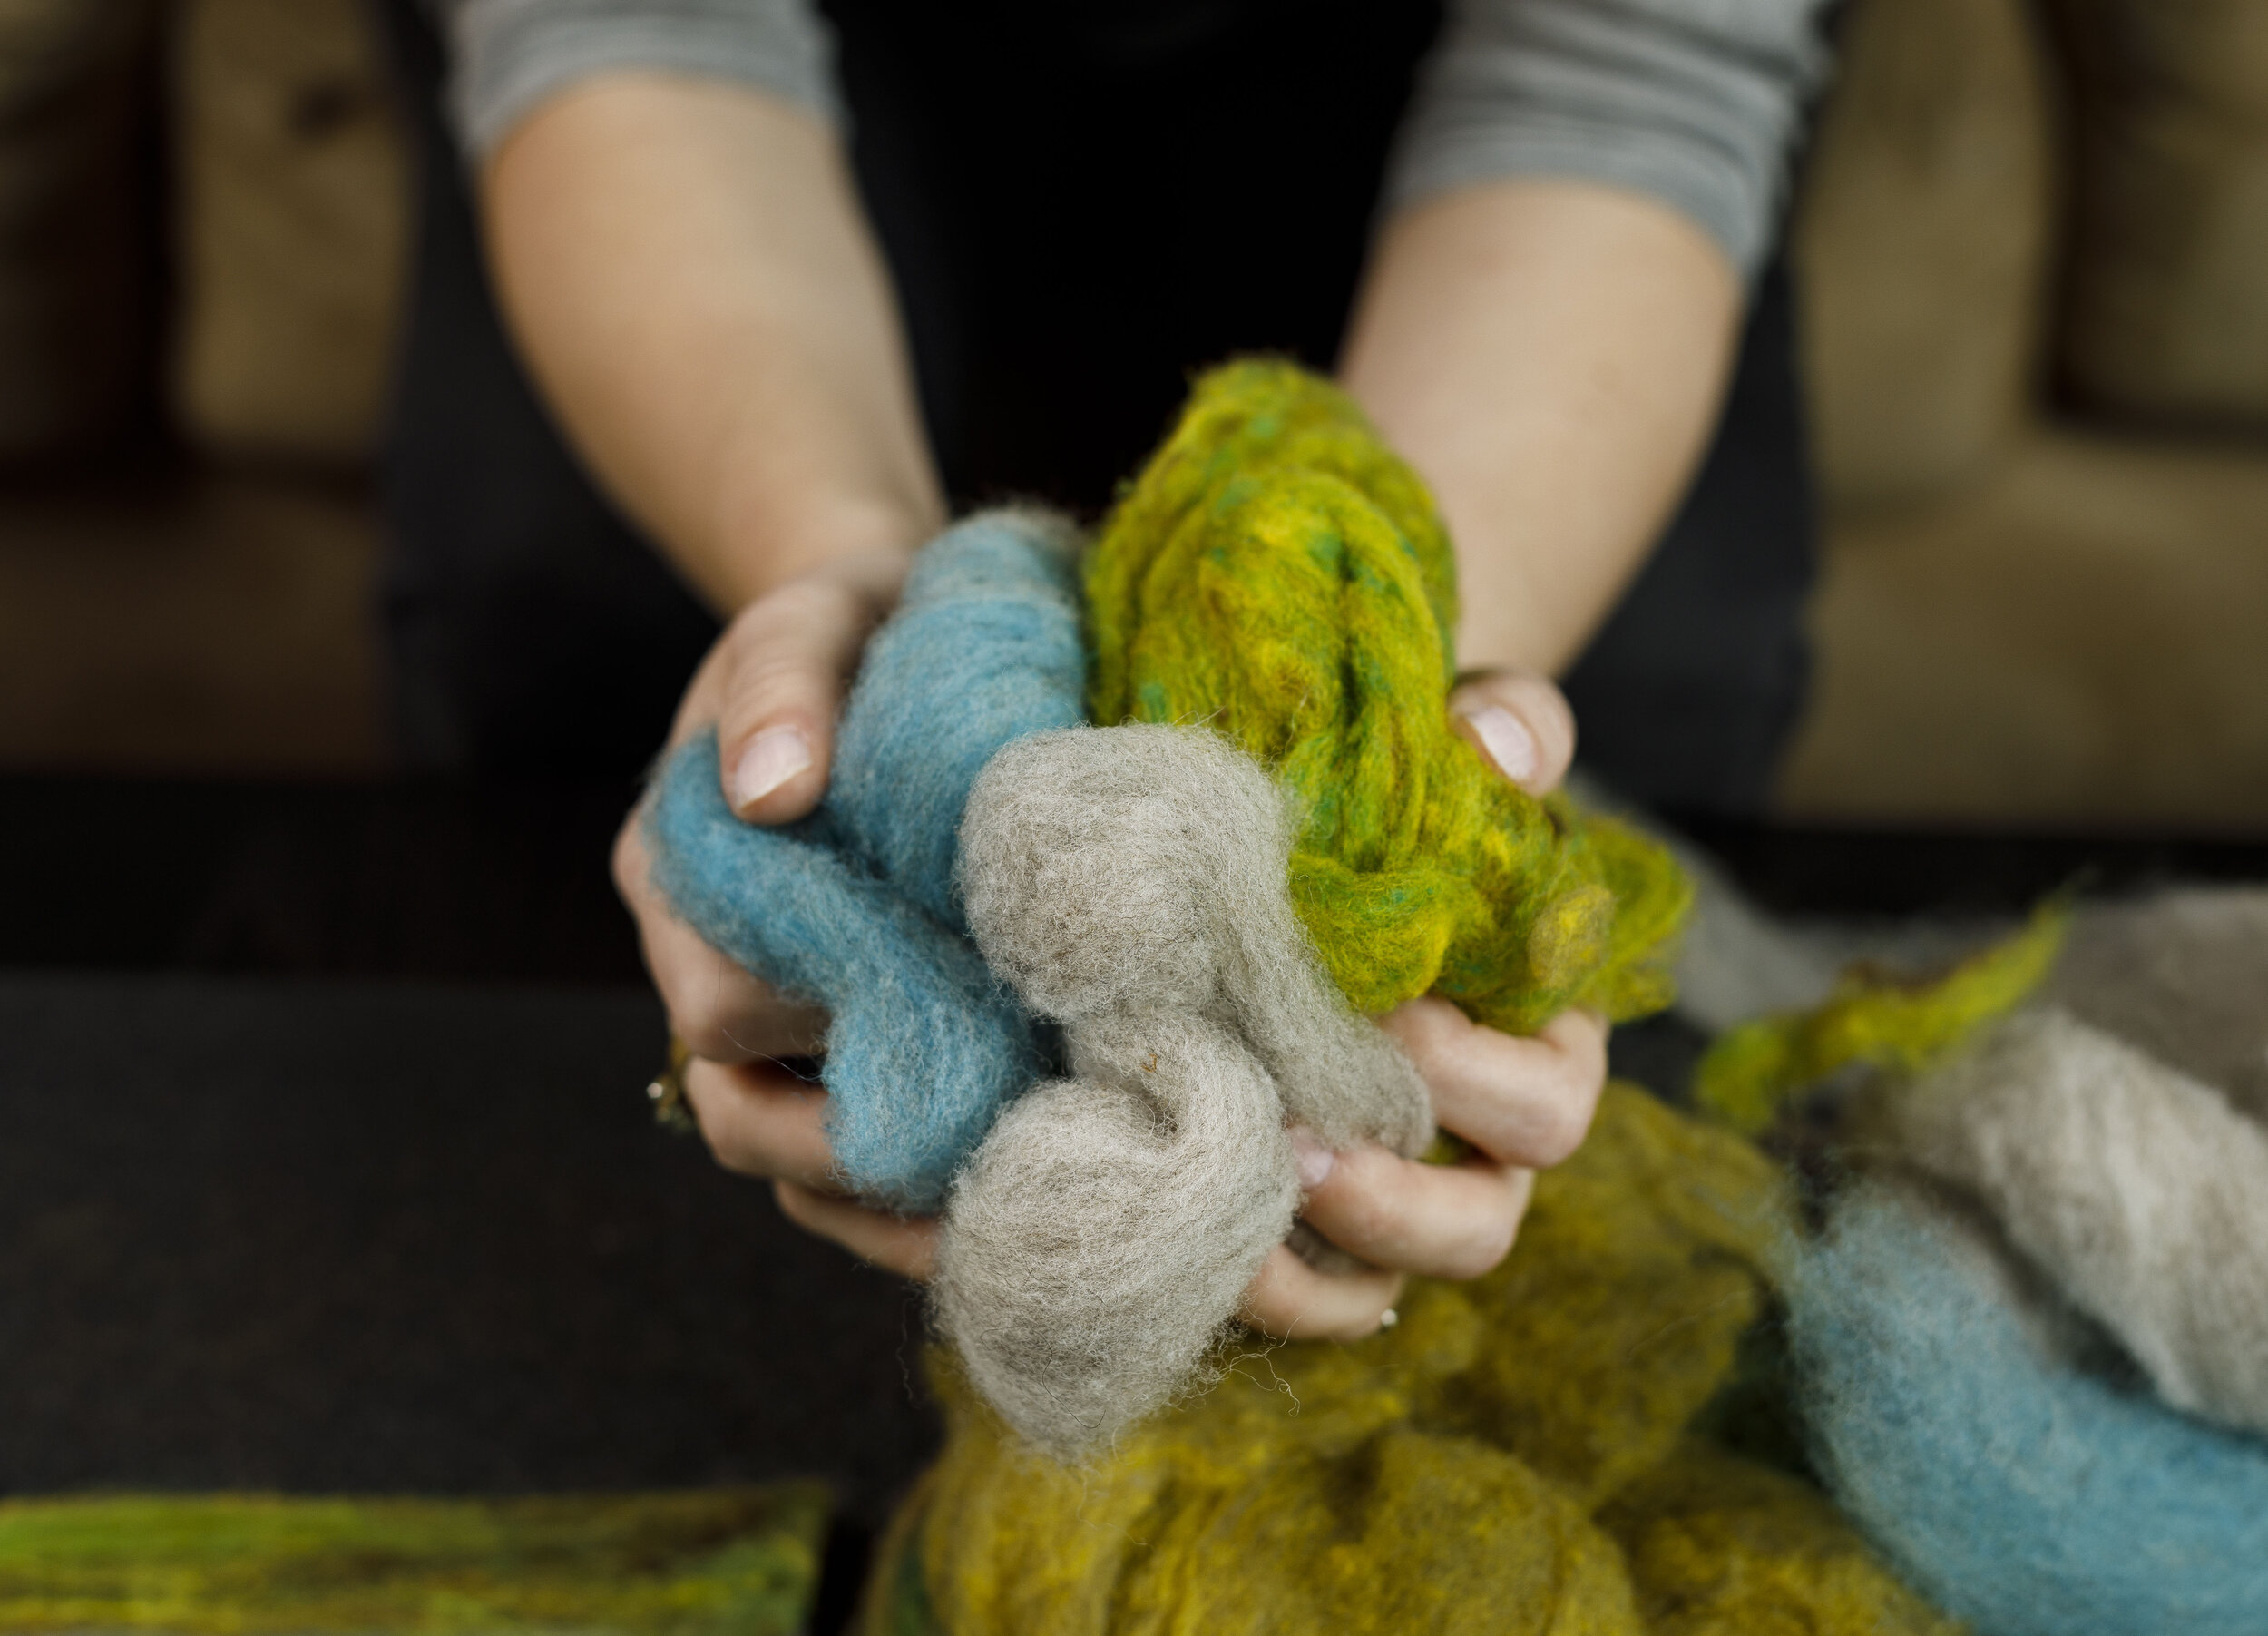
Photo by Eli Warren

Photo by Eli Warren

Types of Fiber:

You can felt with fiber from sheep, alpacas, and even rabbit fur & dog hair. My favorite fiber for needle felting is coarse sheep’s wool, specifically from Corriedale and Blue Faced Leicester breeds. 

Tools: 

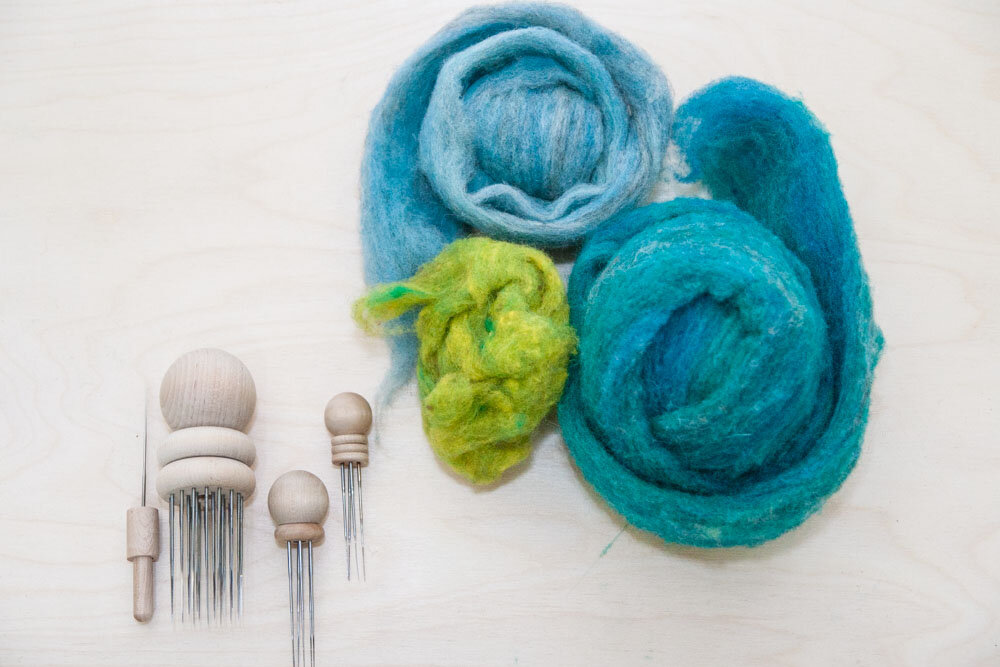
Needles: felting needles are specialized because they have tiny inverted barbs which agitate and pull the fiber tight with each poke. I usually stick with a 38 gauge needles. If you want a fine finishing needle, a 42 gauge is a good option, but these break very easily. Needles can come in a spiral, triangle, or star shape. I highly recommend using a spiral shape - the barbs are oriented in a twist around the needle shaft, and it helps grab more fiber every time you poke the needle into your workpiece. It’s a tiny short cut, but I love it!

OnceAgainSam2216.jpg

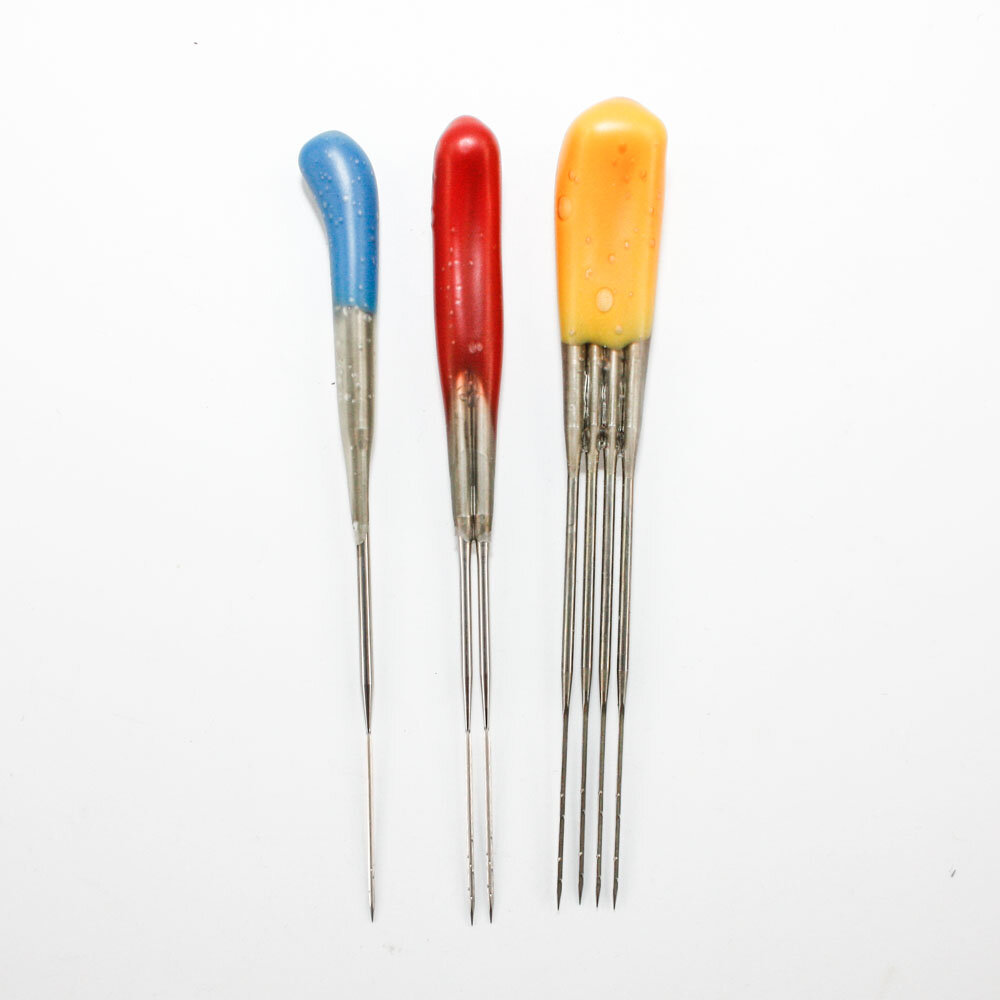
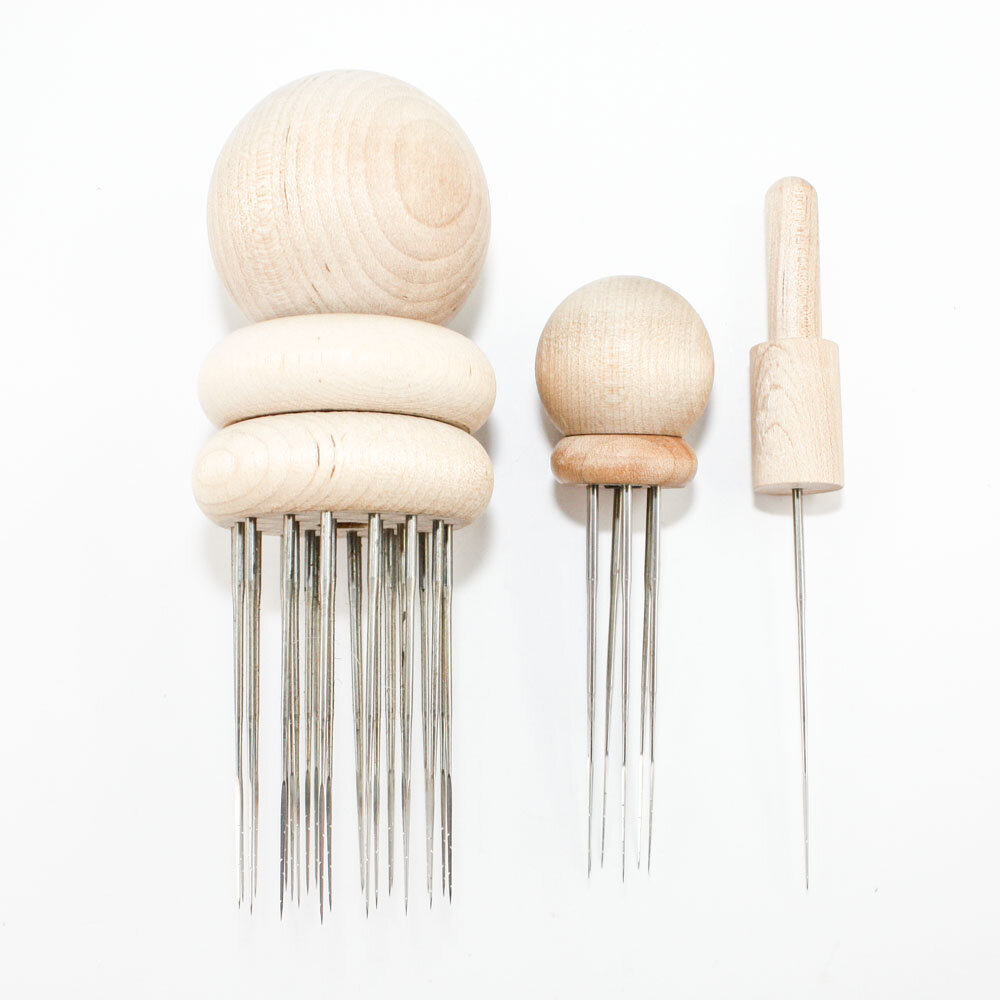
Needle Holders: You don’t technically have to have one, but they can be useful and make felting more comfortable. I use my single needle holder daily, my 4 needle holder regularly, and I have holders for 6, 12, and 24 needles as well, but don’t use them as often unless I’m working on something huge. 

OnceAgainSam2213.jpg

Feting pad: a dense foam worksurface you keep on your lap or table top while you felt. I recommend a felting pad that’s 2” thick. They come in many sizes - i have some that are 4x4, some that are 24x26, but I use my 8x10 the most. I also have a “felting pillow” I like from Bear Creak Felting & Design.

OnceAgainSam6286.jpg

I teach many workshops a year (and virtual courses too!) so if I can help you in your needle felting journey, please reach out. I love this medium and I hope you do too! Be sure to checkout some of my process videos on YouTube so you can see how this magical medium works.

OnceAgainSam5230.jpg

Punching a Pillow

For the first time in a long time, I have room in my schedule for a personal project. Believe me, I’d much rather be out in the world doing craft shows, teaching workshops, and finding inspiration at a residency, but this pandemic had other plans for the spring season. But I’m certainly making the most of this time!

IMG_2925.jpg

I took a week-long rug hooking course at the John C. Campbell Folk School in the fall, but punch needle is something totally different (even though they’re both referred to as “rug hooking” in many circles). The traditional rug hooking I learned at the Folk School involved pulling up little strips of cut wool fabric (with a hooked tool) through primitive linen backgrounds, working from the back to the front. Punch needle, on the other hand, uses a large needle that’s threaded with yarn (or other material) and you push the needle through your fabric from the backside, creating loops on the frontside.

IMG_3013.JPG

As a beginner to both of these crafts, I have found punch needle techniques to be far more forgiving, and I think that has to do with using thick yarn. It fills out your piece more neatly, and you don’t have to constantly worry that your strips of fabric are getting twisted or if your loops are slightly different heights. Punching is also significantly faster so you see way more progress in the same amount of time compared to traditional rug hooking.

IMG_3468.JPG

I received Rose Pearlman’s “Modern Rug Hooking” book for Christmas and after reading through it, I was able to get right to work. I had tried to teach myself and make some pieces on my own before that, but was having trouble getting things to work. It was simple things I had wrong - I hadn’t purchased the right background fabric, the yarn I wanted to use was way too thin (or thick) for the punch needle I had, etc. However, after reading through the book, I could move on from all of those rookie mistakes.

IMG_3584.JPG

I’ve been dabbling in some mixed media fiber art pieces, combining traditional rug hooking with punching and even needle felting, so this was my first large scale project that’s created from 100% punch needle techniques. This accent pillow took about 10 hours of work and nearly $100 worth of yarn and other materials, so it’s not for sale (I don’t think anyone would pay that much for a pillow), but I really enjoyed making something just for myself, for my own enjoyment. I know once the pandemic is over and we get back into our busy lives, I would never have the time to invest in something like this, so I’m glad I was able to do this now during this slower season.

IMG_3588.JPG

GreenCraft: Making an Upcycled Suede Necklace

It's an honor to have my suede fringe necklace featured in this month's GreenCraft Magazine! This is one of my favorite jewelry projects to make, and it's a great way to use up a variety of miscellaneous suede and leather scraps (which I happen to have a lot of around the studio). My whole handmade jewelry business Once Again Sam is centered around using recycled materials, and leather has always been the most dear to me. I enjoy searching for outdated suede clothing at the thrift store, and giving it new life, once again, in a whole new way as bold but wearable jewelry. 

Below is a step by step tutorial on how to make the statement necklace shown in the GreenCraft article, as well as a #MakersEyeView sharing a time-lapse video of the process from start to finish. Enjoy, and happy crafting!

How to make a suede fringe necklace: 

1. Gather material: I use thrift store clothing as my suede and leather source, but just about anything will work as long as it doesn't fray when cut. 

2. Cut strips: use scissors to cut an assortment of 1/4" wide strips (the length is up to you, mine are about 2 1/2 to 3"). The necklace in the photo used over 150 pieces total, in 20 different colors. 

3. Create pointed ends: give one end of each piece a pointed shape, so they'll have that "fringe" look when strung together. They don't have to be perfect!

4. Punch holes: use an 1/8" circle leather punch to punch a small hole through the top of each piece (the flat end, not the end with the point).

5. Make your chain: cut a length of thin chain around 18-20" (depending on where you want the necklace to lay on your chest), then add a clasp to one end so the leather pieces wont fall off once you begin stringing them on. The chain needs to be thin enough to go through the punched holes. I attached a needle to the end of my chain to make threading easier, because my punched hole was just barely big enough to accept the chain.

6. Start stringing: once you have your colors in the order you want them, begin adding your suede strips one by one until you're happy with the overall size.

GreenCraft has featured two of my upcycled jewelry projects in the past, and those tutorials can also be found on my blog:

Click HERE for suede fringe earring project

Click HERE for suede cuff project

New Generation of Makers

Recently I've been corresponding with a very talented 11 year old girl in London, Ellie, who's just getting into the crafting world. She's off to an amazing start with her Etsy shop called Befuzzled. I was glad to share some words of wisdom with her on her blog about making a living with your hands, inspiration, and lots of other stuff too: http://befuzzledlondon.tumblr.com/

I ordered one of her cute little plushy toys a few weeks ago. The s'more with the curious face is on it's way to me! Can't wait to put it in my studio so it can smile at me while I craft away. I'm so glad to see a new generation of makers at work, younger than ever, and I look forward to watching how Ellie's creations and brand progress in the future. Be sure to visit her shop: https://www.etsy.com/shop/befuzzled

Photo credit: Befuzzled

Photo credit: Befuzzled